Bullion Stitch
When it comes to Bullion Stitches the issue many have is that they become very bulky. However a nice and simple way to achieve sleek and long bullion stitches is to use a hair pin – just pull the legs a little apart and make sure your hook can move through.
This tutorial is based on the hair pin trick.

Instructions

Step 1
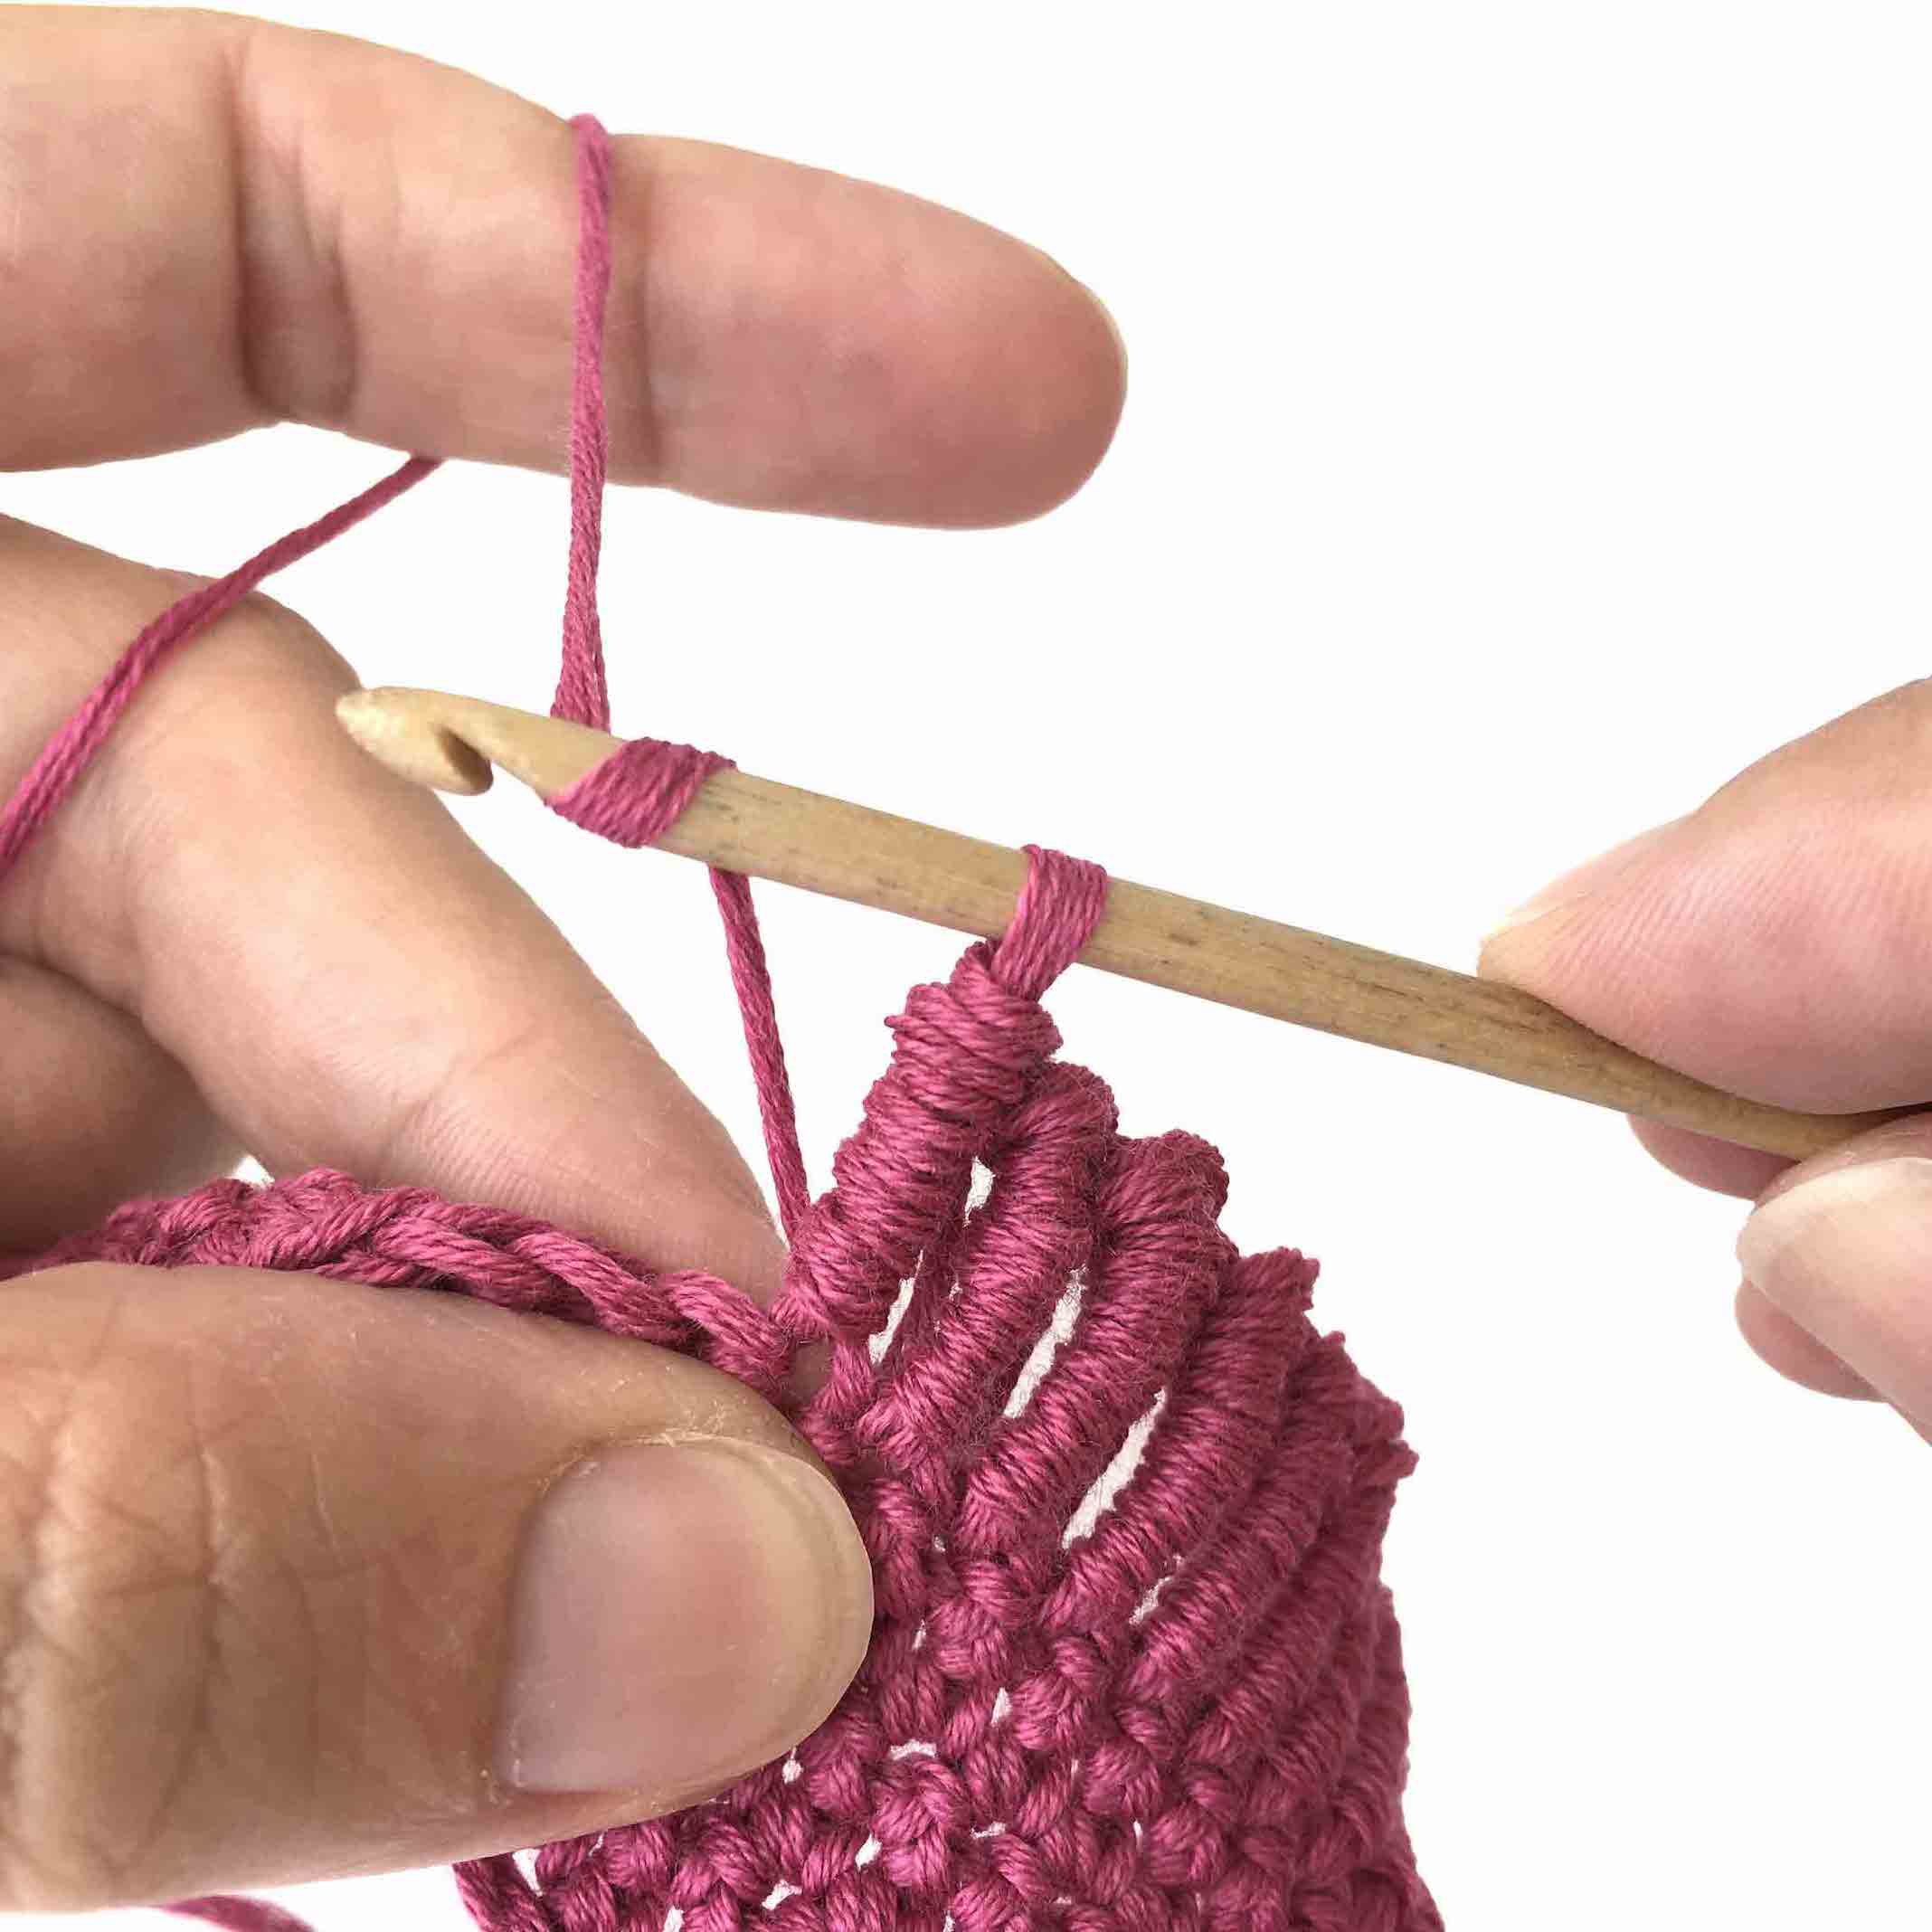
Take your hook out off the loop and pull it through the stitch where your bullion stitch will be.
Put your hair pin inside the loop and twirl the yarn around it. Keep the yarn secure with your index finger.

Step 2
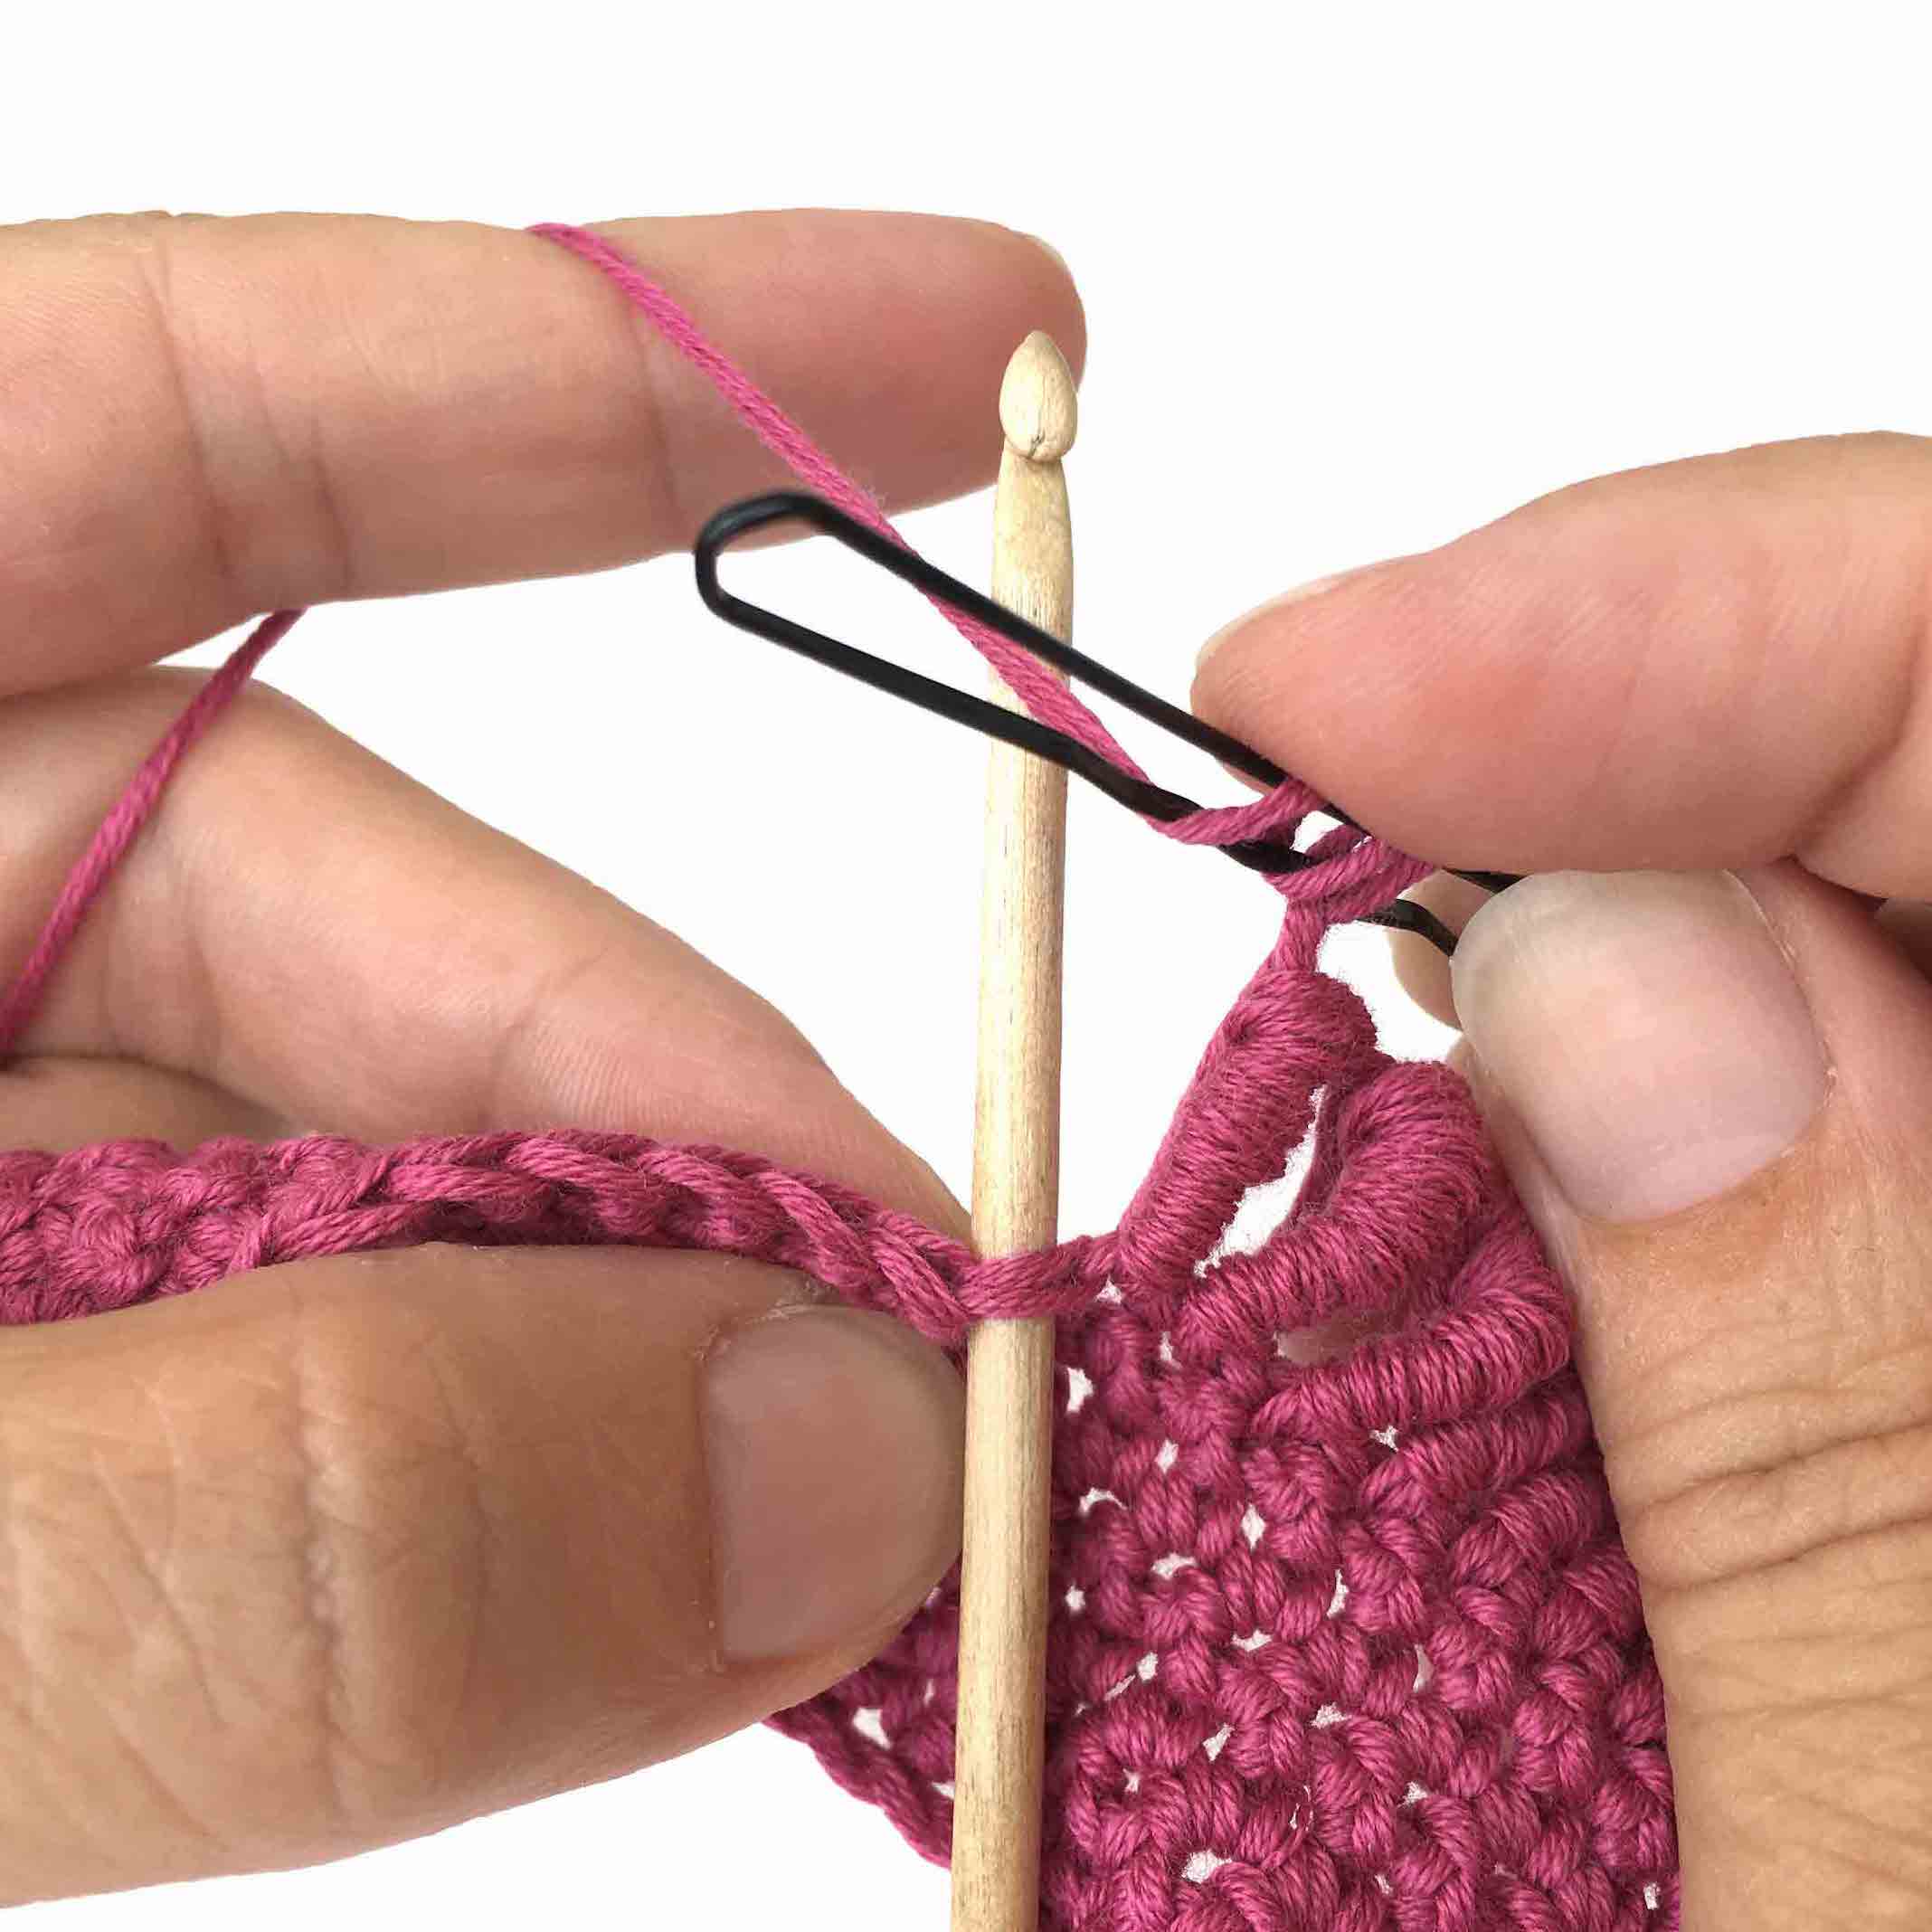
Place the hair pin on the backside of your work with the arch just above the line. Yarn over hook and pull a long loop.
Remove your hook from the long loop and push it through the arch of the hair pin from the back towards you – place the long loop on the hook again and pull back through as shown on the picture.

Step 3
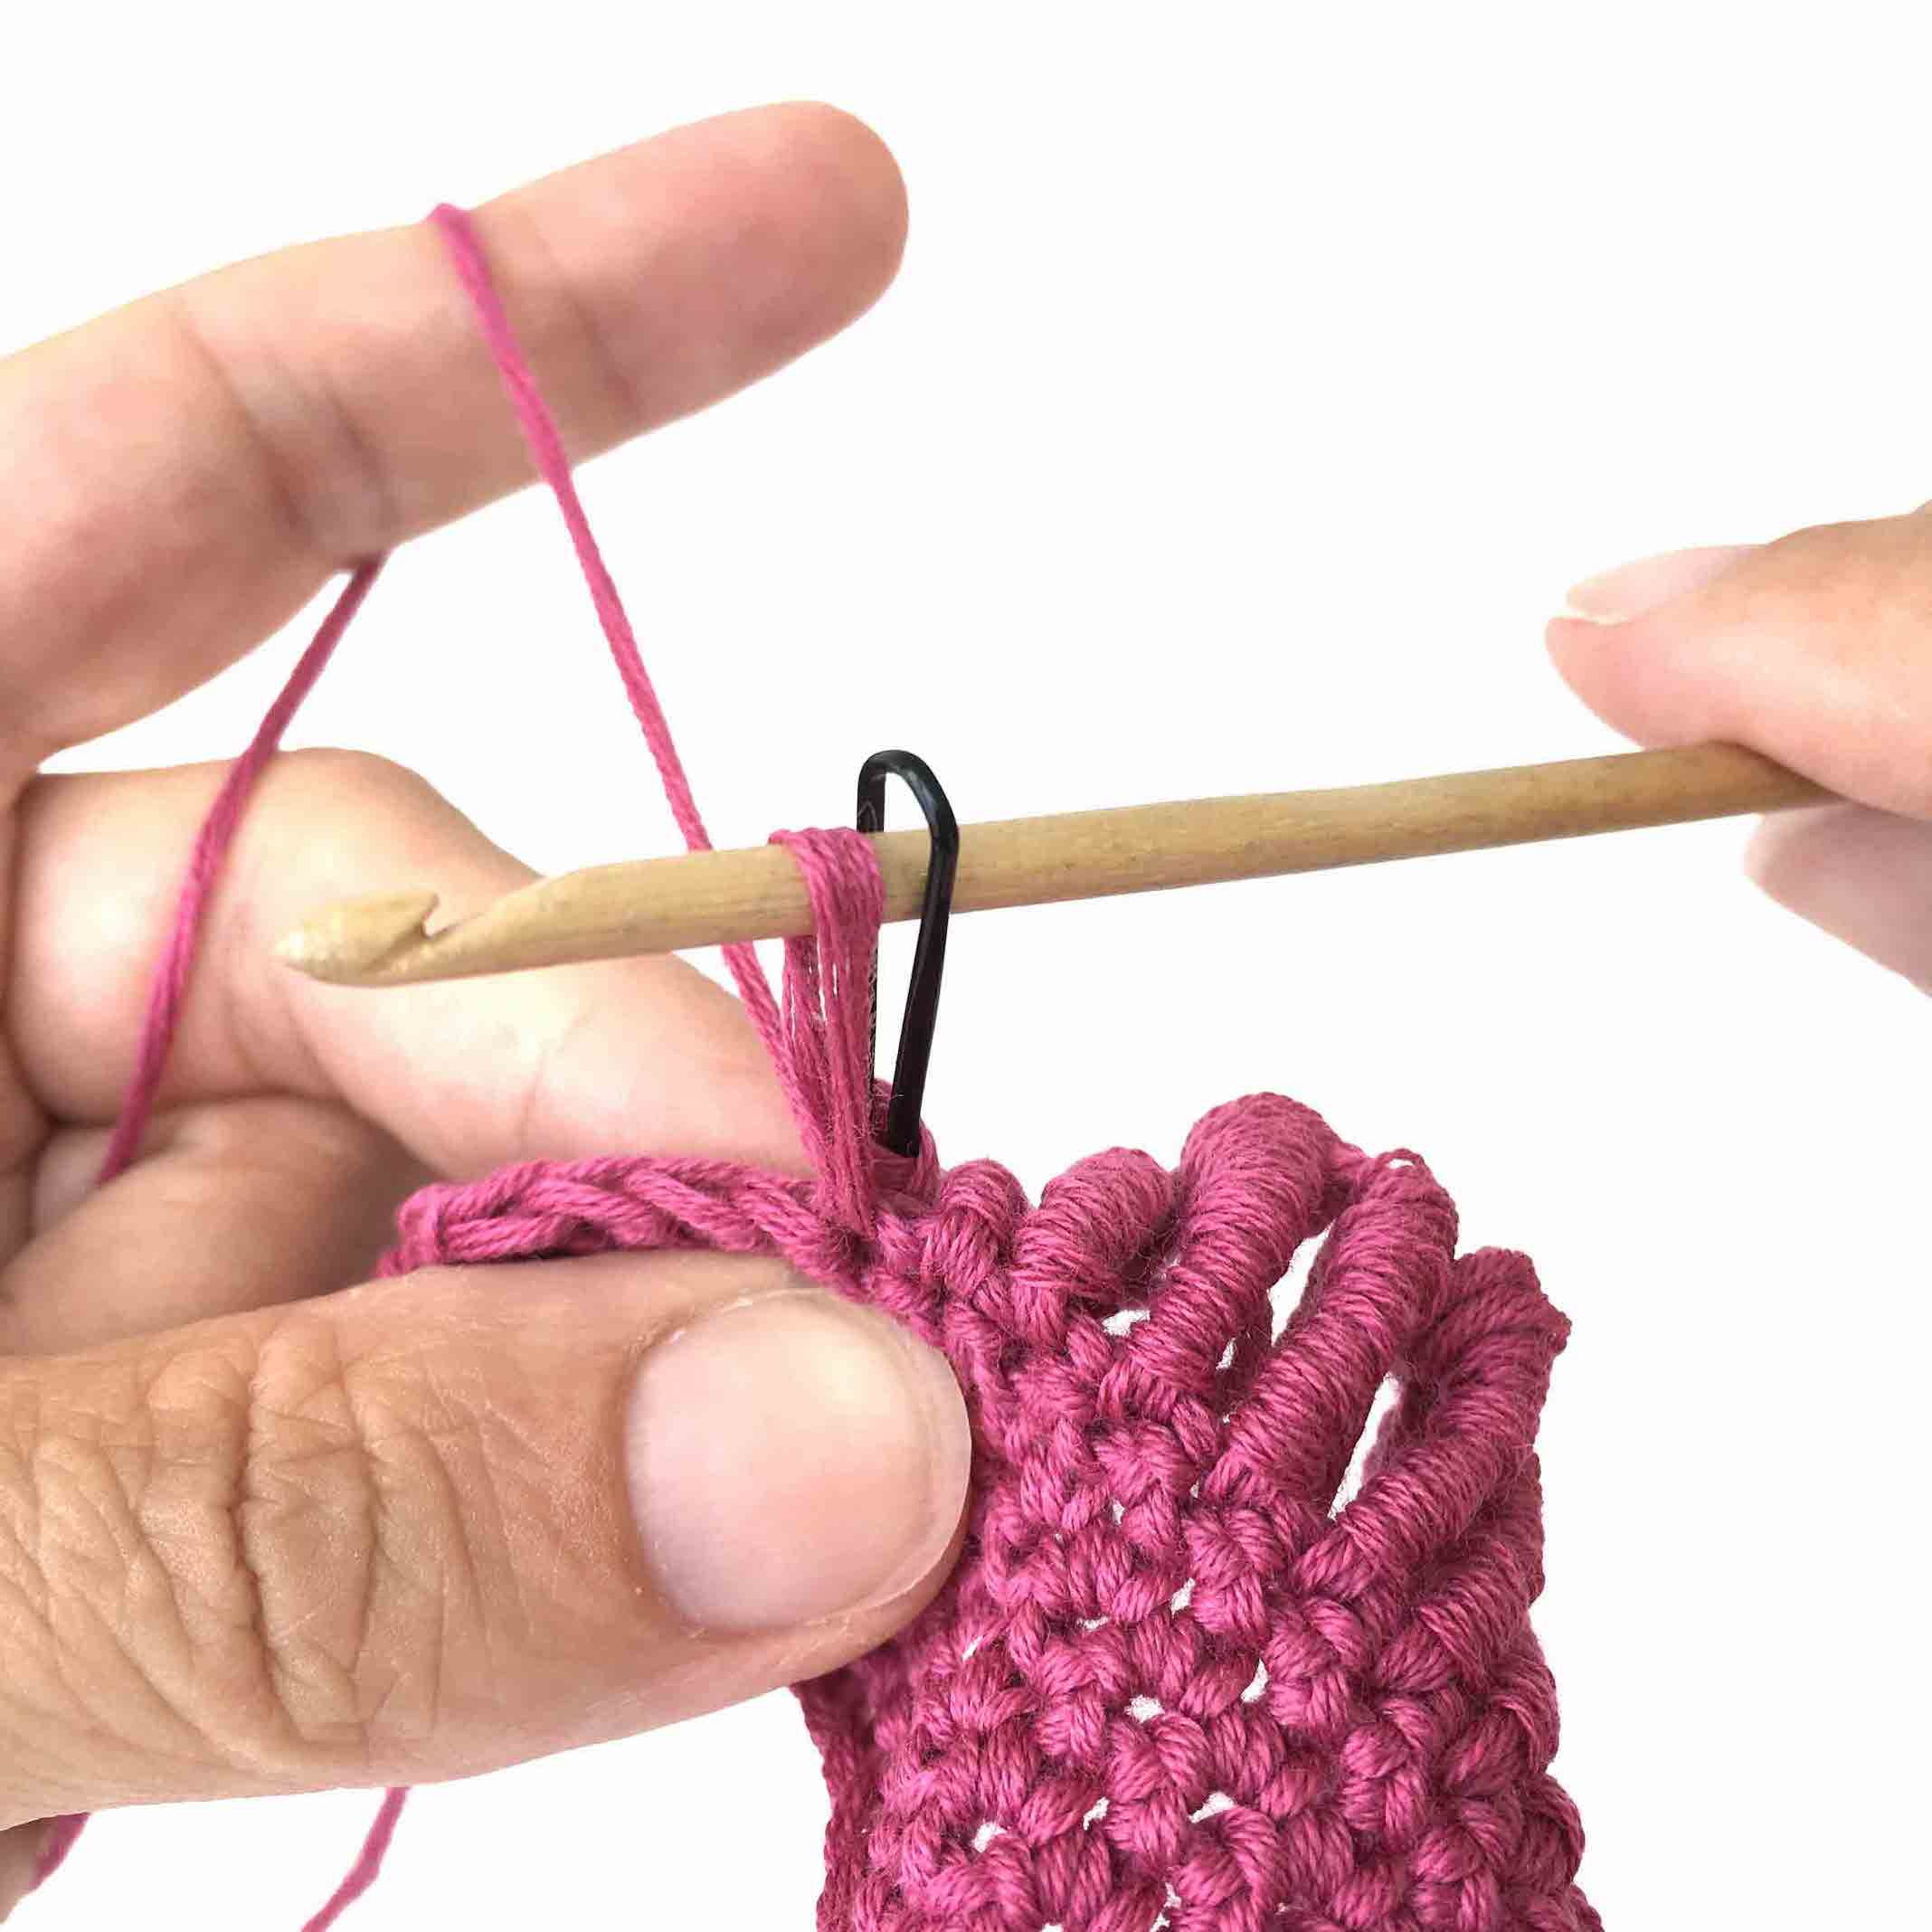
Remove the hook and place your project on a flat surface.
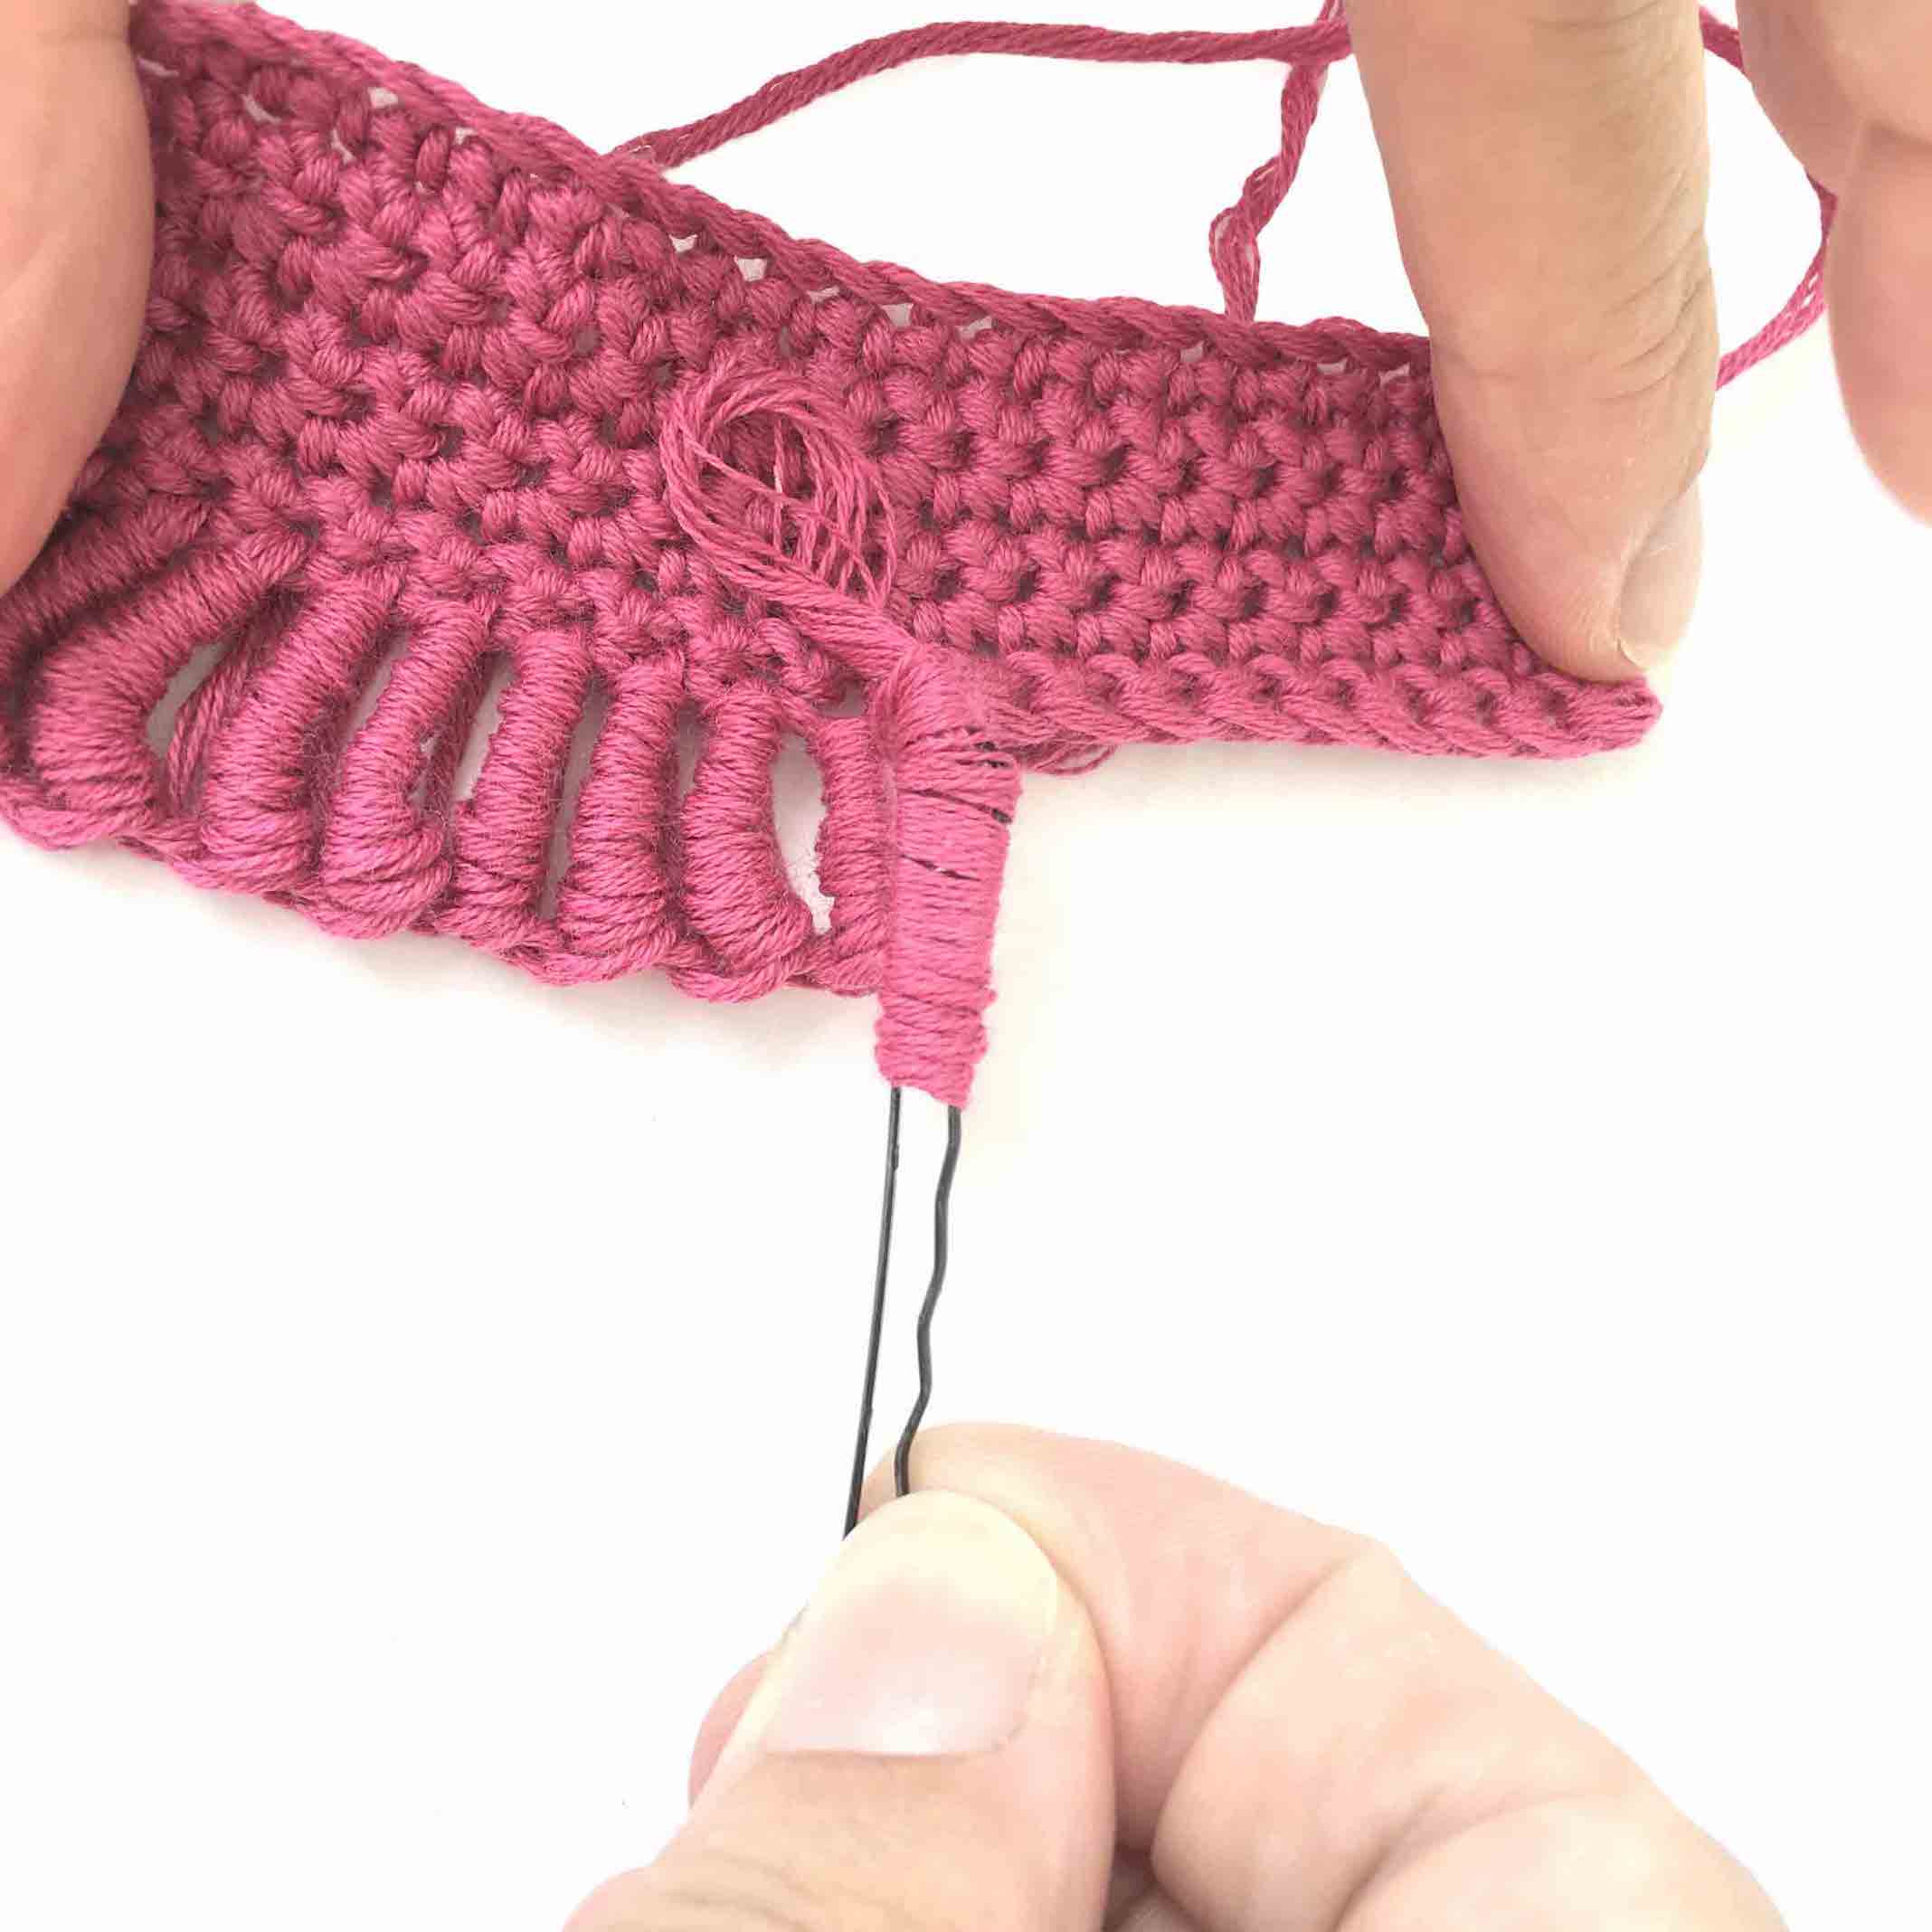
Gently pull your hair pin with the longer loop through all the loops – You can help this along by using your fingers to move the loops off the hair pin.

Step 4
Place the loop on your hook again. Tighten the yarn a little to get the desired height. Yarn over hook and pull through the loop.
Continue to make the next Bullion Stitch.
This is a very tricky stitch to master, but it is not impossible. Once you have practised and gotten the feel of the stitch, you can create wonderful textured crocheted projects.
